Using SharePoint Lists For Renewal Notifications
The Problem
Another common problem we seem to come across as IT Administrators is effectively tracking software licenses, renewals, warranties, and then getting notifications on those items prior to them actually expiring. I am sure we have all had the terrifying realization that a critical domain has nearly, if not already, expired for a client. Maybe you’ve even forgotten a VMware warranty and later had to pay a reinstatement fee.
While there are plenty of warranty and renewal tracking software choices available on the market, finding one that offers features such as notifications and additional customization can be difficult and/or become very cost intensive depending on the amount of items you need to track. Others just have a lot of extra bloated features that you may not find necessary for your particular use case. These are both big issues whether you are a small service provider or internal resource.
Solution: SharePoint Lists
If you aren’t already familiar with SharePoint Lists, they could be described as excel-like tables hosted in a SharePoint site that allow you to add custom fields, lookup fields to other lists (similar to relational databases or v-lookups), and enable built-in notifications when someone adds a new list entry or modifies an existing entry. In addition to this, there is a powerful PowerShell module for interacting with SharePoint that we can use to interact with Lists to add, remove or update items or check the datetime field on a list for custom alerts.
If you already have Business or Enterprise licensing with Microsoft 365, chances are you already have SharePoint Online readily available to you! However, if you own something like SharePoint 2019, Lists are also available for the on-premise editions as well.
Here is a good read on getting started with creating Lists.
How I Set Up My List
Using the quick getting started guide from Microsoft, that I linked in the above section, you should be able to get up and running with a new List in not time flat. All I did was go to a new Microsoft 365 SharePoint Site I spun up, click on the “New” dropdown and choose “List”.
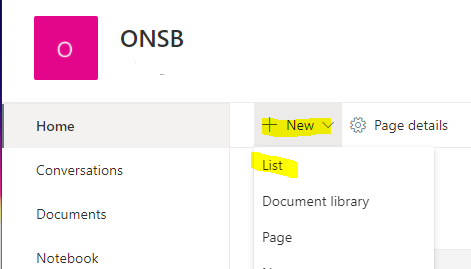
Menu option for adding a new list. I named my list “Renewals” so that it would be easily identifiable.
By default, the list will have a few columns/fields auto-generated.
- Title - Single Line of Text - The name of the entry.
- Modified - Datetime - When the entry was last modified.
- Created - Datetime - When the entry was created.
- Created By - Person or Group - What user created the entry.
- Modified By - Person or Group - What user last modified the entry.
I left the default fields in place and added the following additional columns:
- Expiration Date - Datetime - The most critical piece would be the actual expiration date we want to track.
- Serial Number - Single Line of Text - If the product or license has a serial number that may be needed for the renewal, we can list that here. Otherwise this can be left blank.
- Notes - Multiple Lines of Text - Any detail description we want to add for us to know the particular use-case of the entry, or special steps needed to complete the renewal.
- Renewal Type - Choice - What type of renewal this is. (i.e. Domain, SSL certificate, Software, Hardware, etc) These are just the fields I decided to start with, and yours can be changed to whatever best suits your particular needs.
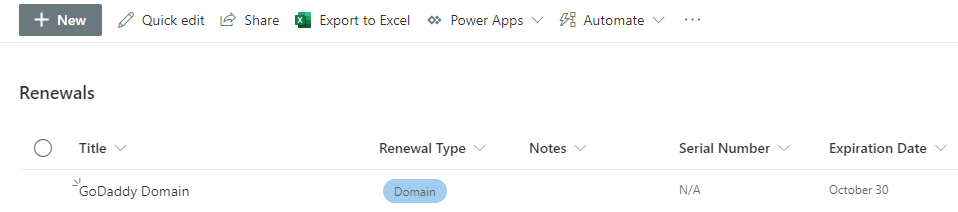
There you have it! In only a few minutes, you have a working list where you can store your renewals and warranties, sort them by date, type, etc.
Adding Notifications with PowerShell
I will be covering this portion for the Microsoft 365 Version of SharePoint Online and the SharePointPnPPowerShellOnline module. There is a SharePointPnPPowerShell2019 version for the latest on-premise version and I believe the commands may be similar, however, authentication will be handled differently for these.
As always I recommend creating a separate account for interacting with scripts, rather than using a real user account that may contain sensitive data or have other permissions to admin areas. In my case, I’ve added a new development user to my 365 account, given it access to an Office 365 license that gives the account both the required SharePoint license and Email license. The email license is not necessary, but will allow me to use only a single account for checking the list and sending the email, rather than using two sets of credentials in the script. I have also added the account as a member to the SharePoint list to that it has permissions to read it.
After you have the account licensed and added to the SharePoint List, we will need to install the required PowerShell Module for interacting with SharePoint Online. We can do this by opening a PowerShell window as admin and running the following command:
Install-Module SharePointPnPPowerShellOnline
Once the module installs successfully, we can begin building out the below scripts in something like PowerShell ISE:
### SET VARIABLES FOR SCRIPT ###
################################
$username = "Username with Access to SharePoint List"
$password = "Password for the account"
$securePassword = ConvertTo-SecureString $password -AsPlainText -Force
$creds = New-Object System.Management.Automation.PSCredential ($username, $securePassword)
$sharepointURL = "URL for the SharePoint Online List"
$listName = "The name of the list you created for the renewals"
$notifyDaysPrior = "30"
### TRY CONNECTION TO SHAREPOINT ###
####################################
try{
Connect-PnPOnline -Url $sharepointURL -Credentials $creds
}catch{
Write-Host "Unable to connect to SharePoint Online. Please confirm the URL and credentials are correct and that the site is available."
Write-Host $_
Exit $LASTEXITCODE
}
### TRY TO GET LIST IEMS AND FIND EXPIRING ITEMS ###
####################################################
try{
$listEntries = (Get-PnPListItem -List "$listName").FieldValues
$emailBody = ""
#Iterate over all list entries and if the certificate is expring within our threshold, add text to our email body.
foreach($entry in $listEntries){
if($entry.ExpirationDate -lt (Get-Date).AddDays($notifyDaysPrior)){
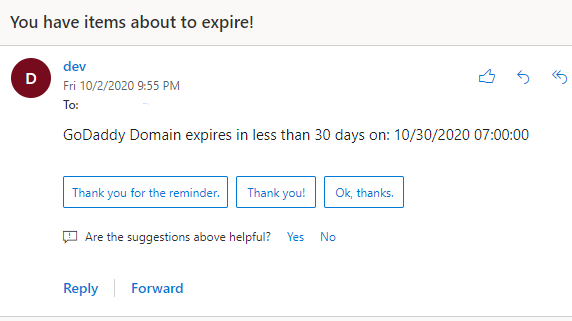
$emailBody += "$($entry.Title) expires in less than $notifyDaysPrior days on: $($entry.ExpirationDate)<br /><br />"
}
}
#If the email body is not still empty, send the email.
if($emailBody.Length -ne ""){
$sendMailParameters = @{
From = $username
To = "EMAIL TO SEND TO"
Subject = "You have items about to expire!"
Body = $emailBody
SMTPServer = "smtp.office365.com"
Port = 587
Credential = $creds
BodyAsHTML = $True
UseSSL = $True
}
Send-MailMessage @sendMailParameters
}
}catch{
Write-Host "Unable to retrieve the list requested: $listName"
Write-Host $_
Exit $LASTEXITCODE
}I added two entries to my SharePoint List, one of which expires in less than 30 days. I then ran my script and confirmed it sent me the email I was expecting.